

It's almost spring, which means its time to start planning out your summer adventures! This mini album is the perfect way to document your summer fun without having to make a huge album to take up space on your shelf! This collection is full of botanicals and adventure, with muted rainbow colors, butterflies, and more! Perfect for a camp album.
Instructions below!
Shop the Collection: bit.ly/3LtzwCn
Camp Silver Lake Mini Album
Handmade By American CraftsSKILL LEVEL: Intermediate
CRAFTING TIME: Varies
SUPPLIES & TOOLS: Shop the Collection: bit.ly/3LtzwCn
DIRECTIONS:
Basic Album Components
1. Trim 15-20 patterned papers + white cardstock to 4” x 6” pieces.
2. Trim kraft cardstock into 20 pieces measuring ½” x 4”.
3. Gather photos. For this album stick to 4” x 6” or 3” x 4” horizontal pictures.
4. Decide the order of the album. Place map pattern on front and back covers. Place other patterns and photos in order as desired. Do not adhere anything back-to-back yet, especially if stitching is desired.
Specific page-by-page instructions

Cover Page
CRAFTING TIME: Varies
SUPPLIES & TOOLS: Shop the Collection: bit.ly/3LtzwCn
- Jen Hadfield Live & Let Grow 12 x 12 Paper Pad - 669917
- Jen Hadfield Live & Let Grow Alpha Thickers - 669919
- Jen Hadfield Live & Let Grow Phrase Ephemera - 669947
- Jen Hadfield Live & Let Grow Tassels - 669949
- Jen Hadfield Live & Let Grow Icon Ephemera - 669948
- Jen Hadfield Live & Let Grow Sticker Book - 669929
- Jen Hadfield Live & Let Grow Puffy Heart Stickers - 669944
- We R Memory Keepers Cinch Machine - 121494
- We R Memory Keepers Cinch Binding Coils – 1”
(smaller or bigger depending on the bulk of your album) - White 1” 432397 - White Cardstock
- Kraft Cardstock
- Adhesive
- Paper Trimmer
- Scissors
- Sewing Machine (optional)
DIRECTIONS:
Basic Album Components
1. Trim 15-20 patterned papers + white cardstock to 4” x 6” pieces.
2. Trim kraft cardstock into 20 pieces measuring ½” x 4”.
3. Gather photos. For this album stick to 4” x 6” or 3” x 4” horizontal pictures.
4. Decide the order of the album. Place map pattern on front and back covers. Place other patterns and photos in order as desired. Do not adhere anything back-to-back yet, especially if stitching is desired.
Specific page-by-page instructions
Cover Page
1. Adhere kraft cardstock strip to left side of map pattern.
2. Add title using alphabet Thickers and printed text on white cardstock.
3. Embellish with puffy hearts or as desired.
4. Stitch down the edge of kraft cardstock and across puffy hearts if desired.


Page One
1. Trim 3” x 4” Card from cut apart patterned paper.
2. Add journaling on a 2 ½” x 4” piece of white cardstock.
3. Adhere 3” x 4” card, journaling, and kraft cardstock strip from left to right on 4” x 6” white cardstock.
4. Stitch down the edge of kraft cardstock and embellish as desired.
Page Two
1. Adhere kraft cardstock strip to the left side of blue striped pattern.
2. Add 3” x 4” photo to patterned paper
3. Add journaling strip on white cardstock.
4. Stitch down the edge of kraft cardstock and embellish as desired.


1. Adhere kraft cardstock strip to the right side of a 4” x 6” photo.
2. Stitch down the edge of kraft cardstock and embellish as desired.
Page Four
1. Adhere kraft cardstock strip to the left side of sunburst patterned paper.
2. Print journaling strip on white cardstock and cut the right end into a banner. Adhere to bottom of patterned paper.
3. Stitch down the edge of kraft cardstock and add ephemera/embellishments to fill the page as desired.
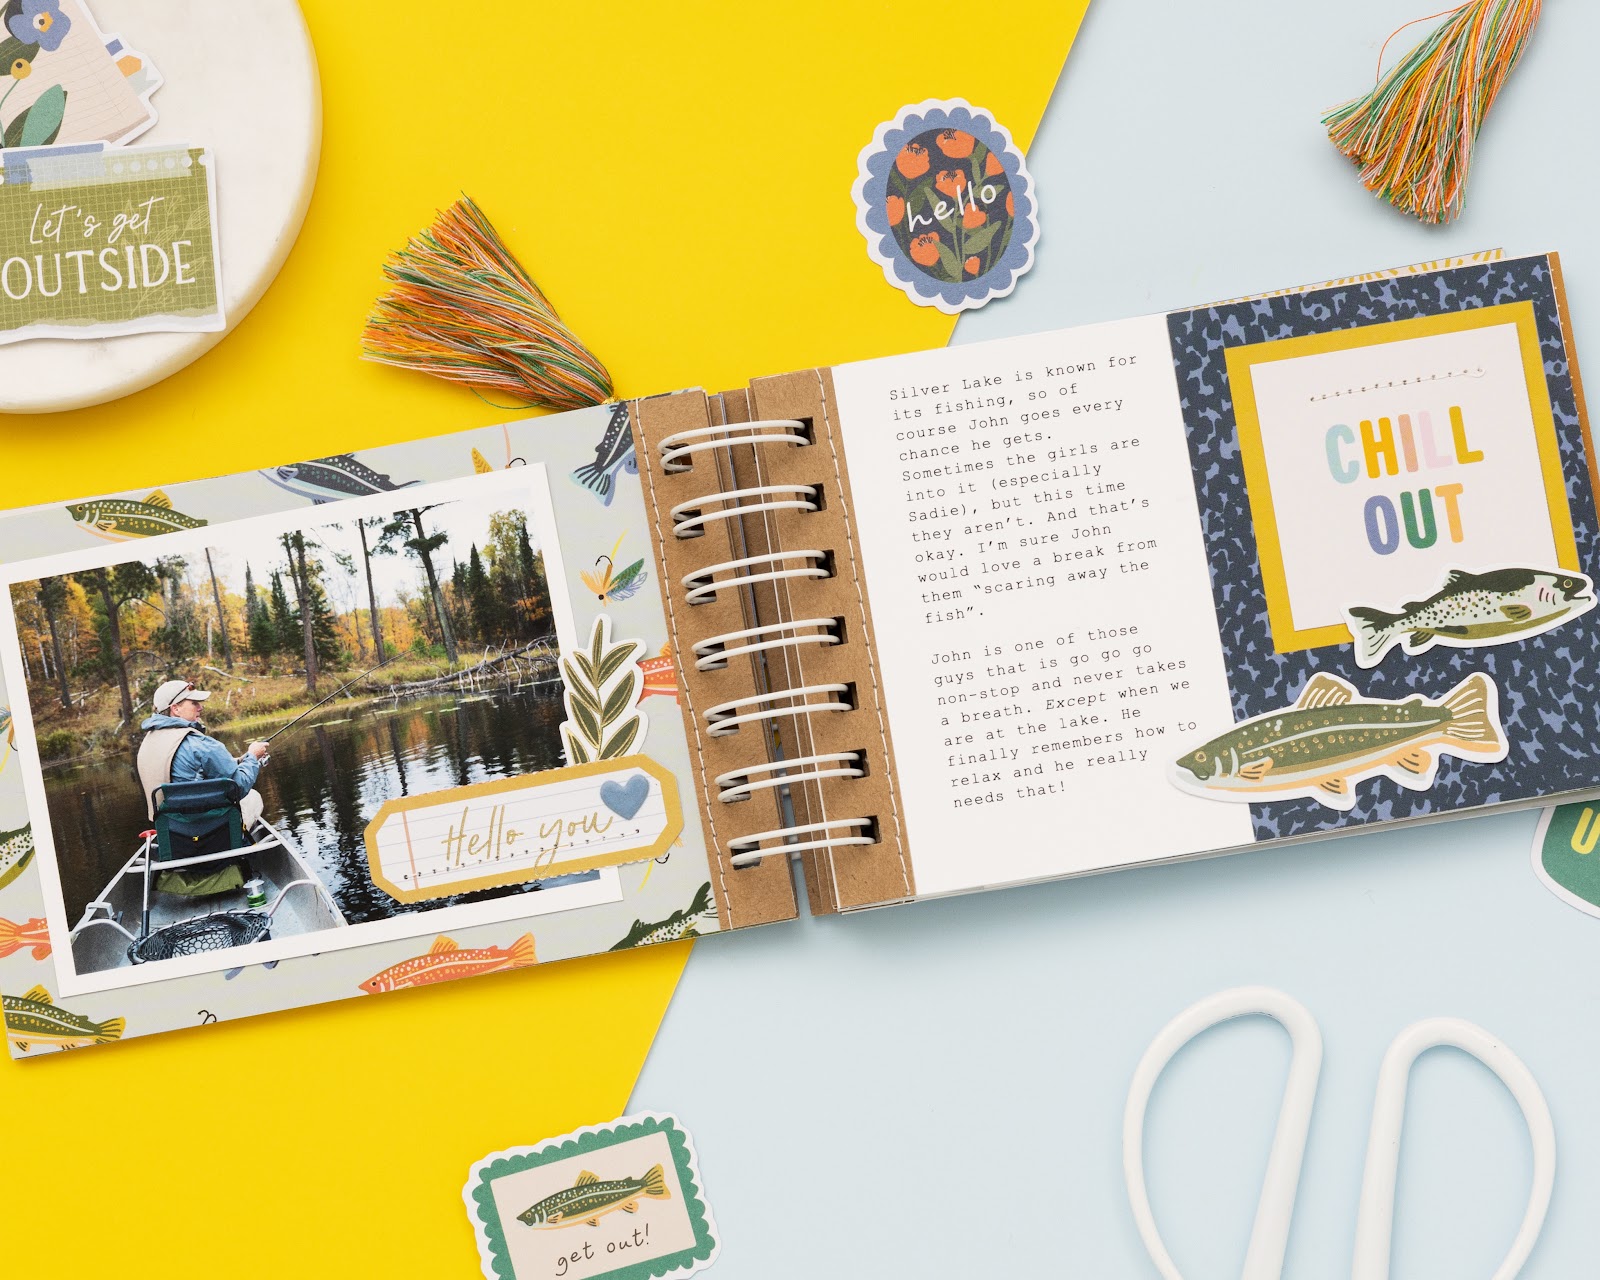
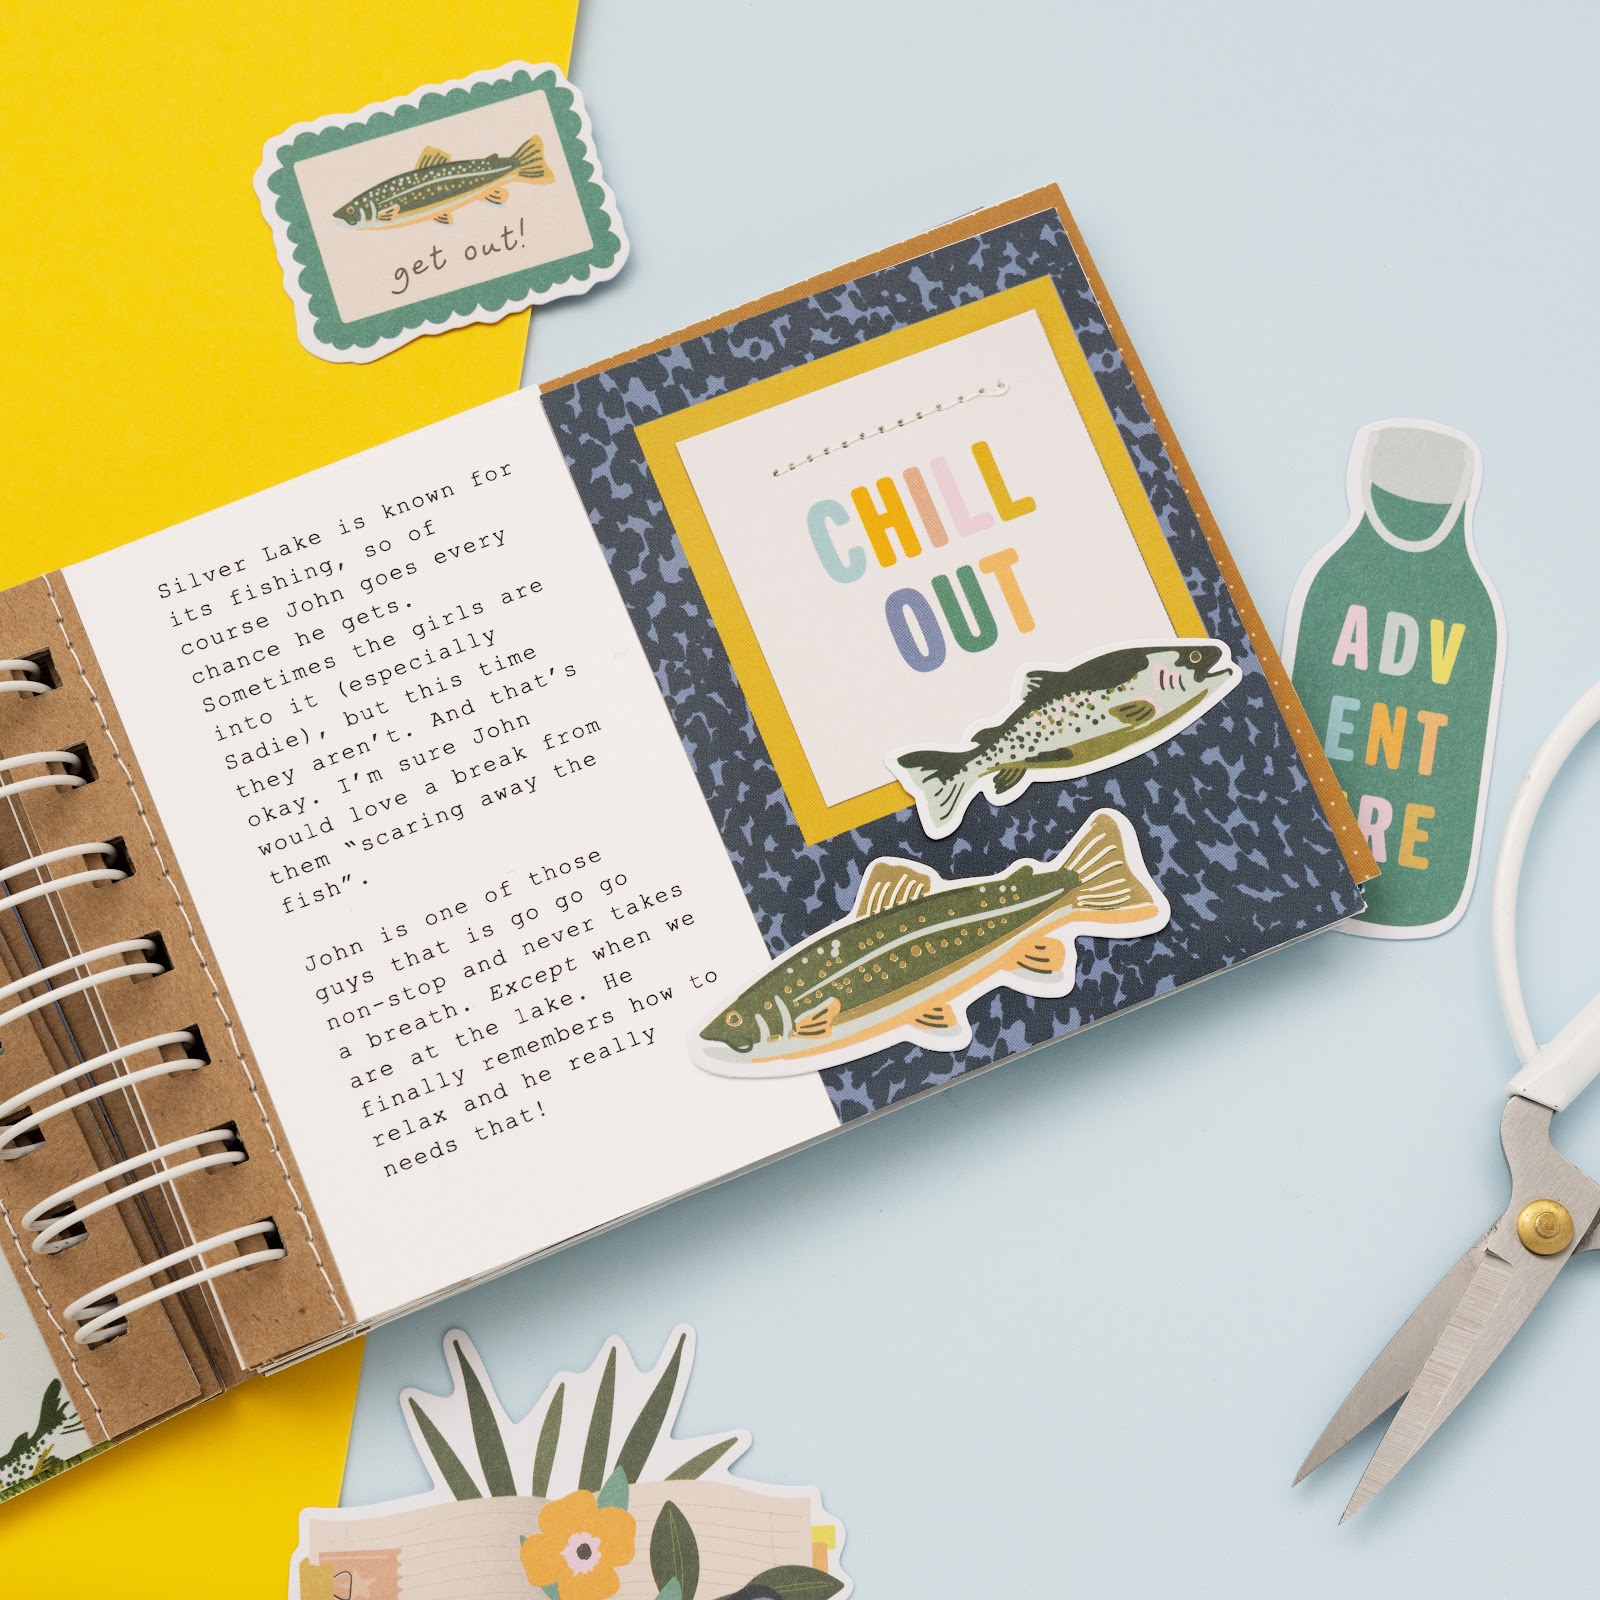
Page Five
1. Adhere kraft cardstock strip to the right side of fish patterned paper.
2. Adhere 3” x 4” photo.
3. Add label shape from journaling ephemera pack to bottom right of photo.
4. Add stitching to kraft cardstock + label and embellish as desired.
Page Six
1. Trim 3” x 4” card from cut apart patterned paper and 2” square from cut apart patterned paper. Adhere 2” square to 3” x 4” card.
2. Add journaling on a 2 ½” x 4” piece of white cardstock.
3. Adhere kraft cardstock strip, journaling, and 3” x 4” card from left to right on 4” x 6” white cardstock.
4. Stitch down the edge of kraft cardstock and 2” x 2” square and embellish as desired.
Page Seven
1. Adhere kraft cardstock strip to right side of 4” x 6” photo.
2. Fussy cut “Wild” sentiment from patterned paper and adhere to center of photo.
3. Stitch down the edge of kraft cardstock and sentiment if desired.
Page Eight
1. Trim 3” x 4” card from cut apart patterned paper.
2. Print journaling on 2 ½” x 4” piece of white cardstock.
3. Adhere kraft cardstock strip, journaling, and 3” x 4” card from left to right on 4” x 6” white cardstock.
4. Stitch down the edge of kraft cardstock and embellish as desired.
Page Nine
1. Adhere kraft cardstock strip to the right side of plaid patterned paper.
2. Add photo to patterned paper.
3. Embellish as desired.
4. Stitch down the edge of kraft cardstock and embellishment if desired.
Page Ten
1. Adhere kraft cardstock strip to left side of 4” x 6” photo.
2. Add journaling to white cardstock and adhere at the bottom of photo.


1. Adhere kraft cardstock strip to the right side of tree patterned paper.
2. Add photo to patterned paper.
3. Stitch down the edge of kraft cardstock and embellish as desired.
Page Twelve
1. Trim 3” x 4” card and 2” x 2” card from cut apart patterned papers.
2. Adhere 2” card to 3” x 4” card.
3. Print journaling on 2 ½” x 4” piece of white cardstock.
4. Adhere kraft cardstock strip, journaling, and 3” x 4” card from left to right on 4” x 6” white cardstock.
5. Embellish as desired.
6. Stitch down the edge of kraft cardstock and embellishment if desired.
Page Thirteen
1. Adhere kraft cardstock strip to the right side of a 4” x 6” photo.
2. Stitch down the edge of kraft cardstock and embellish as desired.
Page Fourteen
1. Adhere kraft cardstock strip to the left side of wave patterned paper.
2. Print journaling strip on white cardstock and cut the right end into a banner. Adhere to bottom of patterned paper.
3. Stitch down the edge of kraft cardstock and add ephemera/embellishments to fill the page as desired.
Page Fifteen
1. Trim 3” x 4” card from cut apart patterned paper and 2” square from cut apart patterned paper. Adhere 2” square to 3” x 4” card.
2. Add journaling on a 2 ½” x 4” piece of white cardstock.
3. Adhere 3” x 4” card, journaling, and kraft cardstock strip from left to right on 4” x 6” white cardstock.
4. Stitch down the edge of kraft cardstock and 2” x 2” square and embellish as desired.
Page Sixteen
1. Adhere kraft cardstock strip to the left side of blue striped paper.
2. Adhere 3” x 4” photo.
3. Add label shape from journaling ephemera pack to bottom right of photo.
4. Add stitching to kraft cardstock + label and embellish as desired.
Page Seventeen
1. Adhere kraft cardstock strip to right side of 4” x 6” photo.
2. Print journaling strip on white cardstock and cut left end into a banner. Adhere to bottom of photo.
3. Embellish as desired.
4. Stitch down edge of kraft cardstock + embellishment if desired.
Page Eighteen
1. Adhere kraft cardstock strip to left side of sunburst patterned paper.
2. Add photo to patterned paper.
3. Add embellishment as desired.
4. Stitch down edge of kraft cardstock + embellishment if desired.
Back Cover
1. Add kraft cardstock strip to right side of map patterned paper.
2. Stitch down edge of kraft cardstock if desired.

Assembly
1. After all stitching has been completed, trim threads.
2. Adhere pages back-to-back – all kraft cardstock strips should be on the center of the book where it will be bound.
3. Use Cinch Binding tool to bind album.
4. Add tassel to top ring for embellishment if desired.
NOTE:
When you have the instructions, it’s easy to switch things up and make them your own! Make this album fit you. Try all 4x6 photos, different papers or embellishment, or even flip this album to fit vertical photos!
3. Add label shape from journaling ephemera pack to bottom right of photo.
4. Add stitching to kraft cardstock + label and embellish as desired.
Page Seventeen
1. Adhere kraft cardstock strip to right side of 4” x 6” photo.
2. Print journaling strip on white cardstock and cut left end into a banner. Adhere to bottom of photo.
3. Embellish as desired.
4. Stitch down edge of kraft cardstock + embellishment if desired.
Page Eighteen
1. Adhere kraft cardstock strip to left side of sunburst patterned paper.
2. Add photo to patterned paper.
3. Add embellishment as desired.
4. Stitch down edge of kraft cardstock + embellishment if desired.
Back Cover
1. Add kraft cardstock strip to right side of map patterned paper.
2. Stitch down edge of kraft cardstock if desired.
Assembly
1. After all stitching has been completed, trim threads.
2. Adhere pages back-to-back – all kraft cardstock strips should be on the center of the book where it will be bound.
3. Use Cinch Binding tool to bind album.
4. Add tassel to top ring for embellishment if desired.
NOTE:
When you have the instructions, it’s easy to switch things up and make them your own! Make this album fit you. Try all 4x6 photos, different papers or embellishment, or even flip this album to fit vertical photos!
.
.
.
We would love to see your finished project! Share with us on Instagram and include #supplyingcreativity so we can check it out!
Want to keep up to date with New Products, Trends and Notions News? Follow us on Social Media! What's New Videos, Product Releases, DIY's and more! Our social media feeds are always packed with fresh new content displaying your favorite brands!
Subscribe to our Youtube Channel!
Follow us on:
PetitPotam provides in-depth and reliable cybersecurity content. The tutorials are structured, easy to follow, and insightful. I appreciate the practical examples that allow readers to learn by doing, making it one of the best educational resources available.
ReplyDeleteWaybackURL is an amazing platform for anyone needing archived web content. Its interface is straightforward, archive coverage is extensive, and speed is impressive. I love how it allows me to explore website changes over time effortlessly. Absolutely reliable and useful.
ReplyDeleteSuch a lovely collection! The colors, textures, and thoughtful details all work together beautifully. It's always inspiring to see creative projects that encourage people to document everyday moments in such a meaningful way.
ReplyDeletesnow rider